Automation Test Engineers would agree that a robust test automation framework adds to the strong foundation of the application’s health check. It is a rewarding responsibility for automation testers to instill robustness by incorporating the best standards in handling the interaction of their tests with the application.
One such practice is to ‘intercept’ the APIs which adds extra points to the maturity of the test strategy and also the framework. Interception means taking control of the APIs by listening to (or spying on) them and manipulating (or stubbing) the APIs by modifying their request or response properties. I believe this is a powerful wand for automation testers to write robust edge test cases.
In this article, we will uncover what API (Application Programming Interface) Interception is and how to effectively use API Intercepts in UI (User Interface) tests using the tool Cypress.
What is API Interception?
The term “Interception” means stopping and / or changing something before it reaches its destination. In Test Automation, API Interception means capturing the API that is going to fire and then manipulating its properties. We can then stub the request before it reaches the server and, in the same way, modify the response properties that come back from the server before reaching the UI. This allows more flexibility in manipulating the behavior of the UI for edge case scenarios. We have many automation tools that provide the feature of intercepting APIs, but the most popular and widely used ones are Cypress, Playwright and Postman.
The Core Concept
We can’t come to a judgment on which tool scores the best as it purely depends on the nature of the application and needs of the project. In my view, the tools have their own strengths and are highly sought after in the testing community.
For example, Postman is purely an API specific tool (to build and test APIs) with a beginner-friendly GUI (Graphical User Interface), and one of its features allows users to create mocks and stubs for the APIs before integrating them with other services. This allows the development and testing team to embrace agile principles by testing the APIs in isolation. Cypress runs its tests in the browser, and it elevates the test automation game by allowing users to test on all layers of the Test Pyramid. Cypress allows users to interact with the APIs within the front-end UI tests, and the core of this article revolves around this concept.
Seaming Vs Interception
Seaming and Interception are two different terms. When we use API interception within your UI tests it's called Seaming. We have discussed in detail about Interception, now let’s dive into Seaming.
To be very granular, ‘Seam’ in clothing terms is the line where two pieces of fabric are stitched together. Likewise, Seams in test automation is the process of joining the different layers of the test pyramid. Angie Jones has beautifully explained this as blurring the lines of test automation and demonstrated real time examples of seams in her article. In the tutorial below, I will be demonstrating how we can introduce Seams - i.e. API interception within UI tests of a real time demo application built by Cypress.
Setting Up and Launching the Demo Application
As a first step of setting up the application, clone the RWA (Real World Application) from Cypress official Github repository. I would request you to follow the step by step instructions provided in the Cypress website before you start cloning. I will highlight the most important points to keep in mind, which are as follows:
- Update your node version to be > or = 18
- Always fork to create your own copy of the repository so that you will be able to contribute changes without affecting the original repository and clone the forked version to your local repository.
- The above points were valid in April 2024, but always double-check on Cypress's official website, as it is prone to change at any time to suit the tool's future evolution.
Once you have cloned and launched the application, you should be able to sign in successfully using the list of test users and password provided in the Getting Started section of the repo. If you encounter any hiccups, make sure your node version is compatible with this application. Any other issues can be easily discussed and resolved in the Cypress community.
I have now launched the application, and the sign-in page of the banking app is as follows
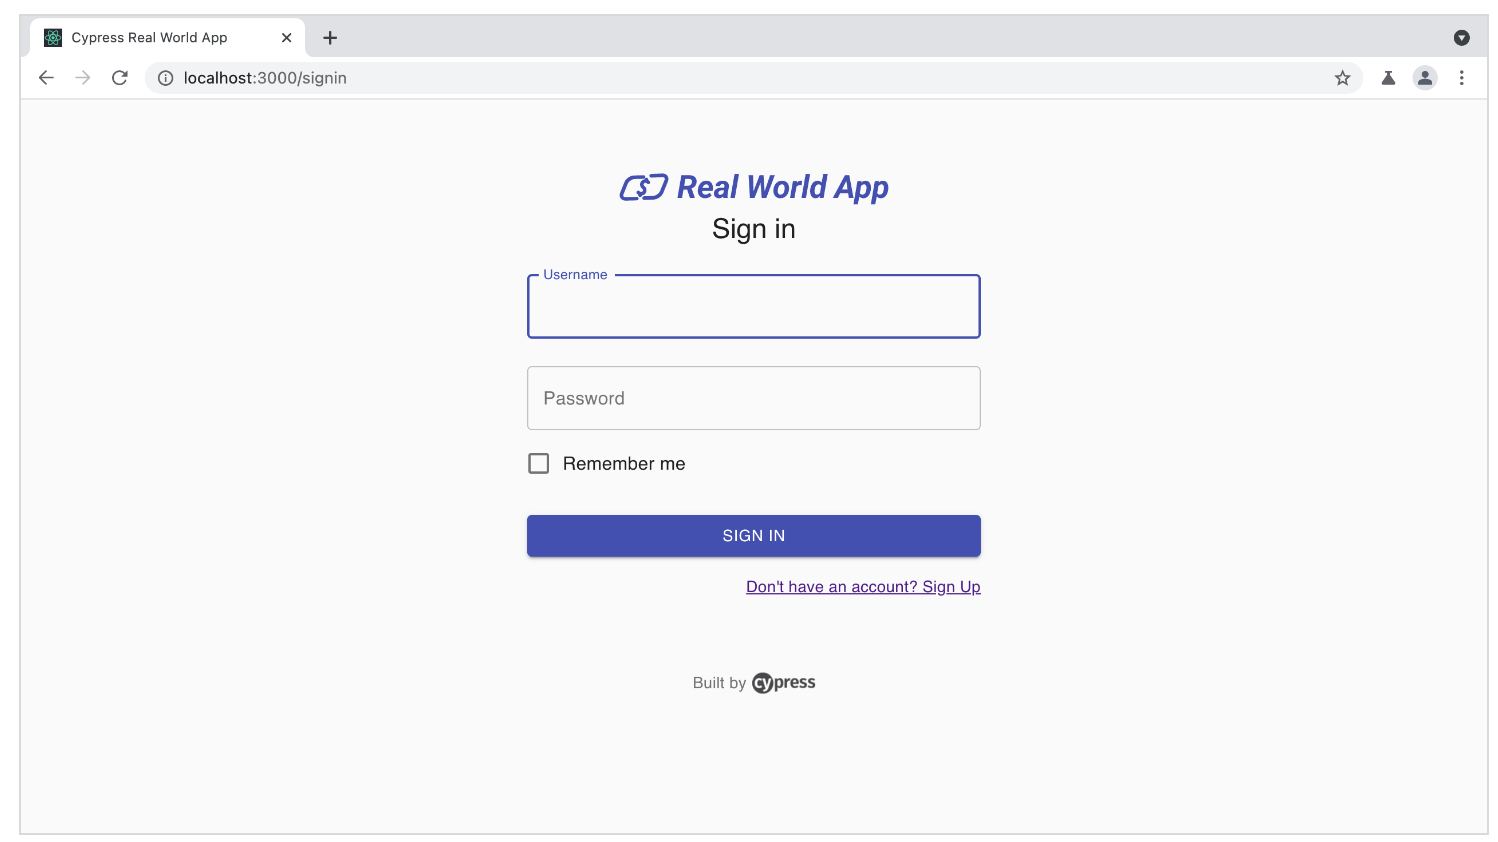 Fig 1: Cypress Real World App Sign In Screen
Once logged in successfully as one of the test users, the Home page looks as below
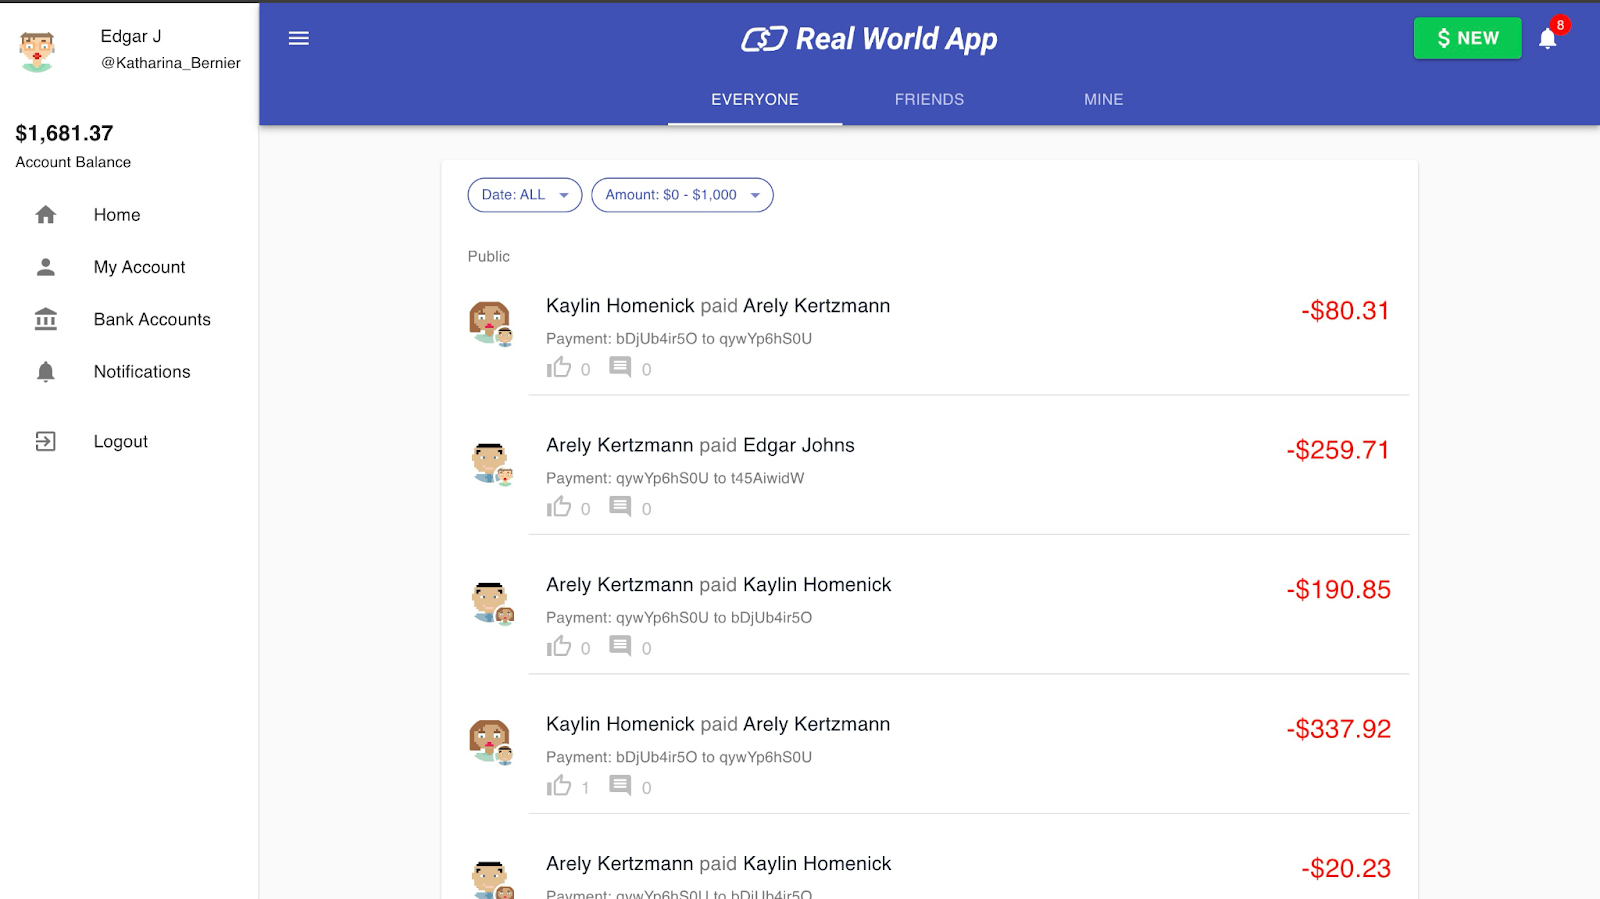 Fig 2: Cypress Real World App Home Page
Setting up the Cypress Framework
After the application is up and running, we have to build a Cypress test framework to write the tests. To simplify the process, I would recommend you to start a new node.js project by installing package.json and cypress. Since these steps are not in the scope of this article, I assume the readers are familiar with setting up a Cypress framework from scratch since this is a very straightforward process consisting of just 3 commands.
Open a new directory,
- npm init for creating package.json file
- npm cypress install
- npx cypress open
Please refer here for setting up Cypress.
Overview of Test Scenarios
Cypress provides users access to the objects with information about the API requests and allows us to make assertions on its properties. The test strategies on intercepting APIs and the basics of the intercepts are explained in detail here. Cypress proves to be very versatile in API interception as the users can mix and match within a single test by choosing to stub the request or the response before allowing them to hit the server.
The test strategies I am going to demonstrate in this tutorial are
- Stubbing the response body
- Waiting on a request and asserting its response properties (status code)
- Stubbing the response status code
- Stubbing the request payload
Let's dive into these strategies in the order listed above.
Stubbing the Response Body
Now, let's identify test scenarios to stub a response body.
The personal transactions tab below gives a bunch of results for the user. Let’s intercept the api call that returns these transactions and modify the response body in such a way it does not return any results. I’m now curious to know how the UI will gracefully digest the response and how will the UI change accordingly.
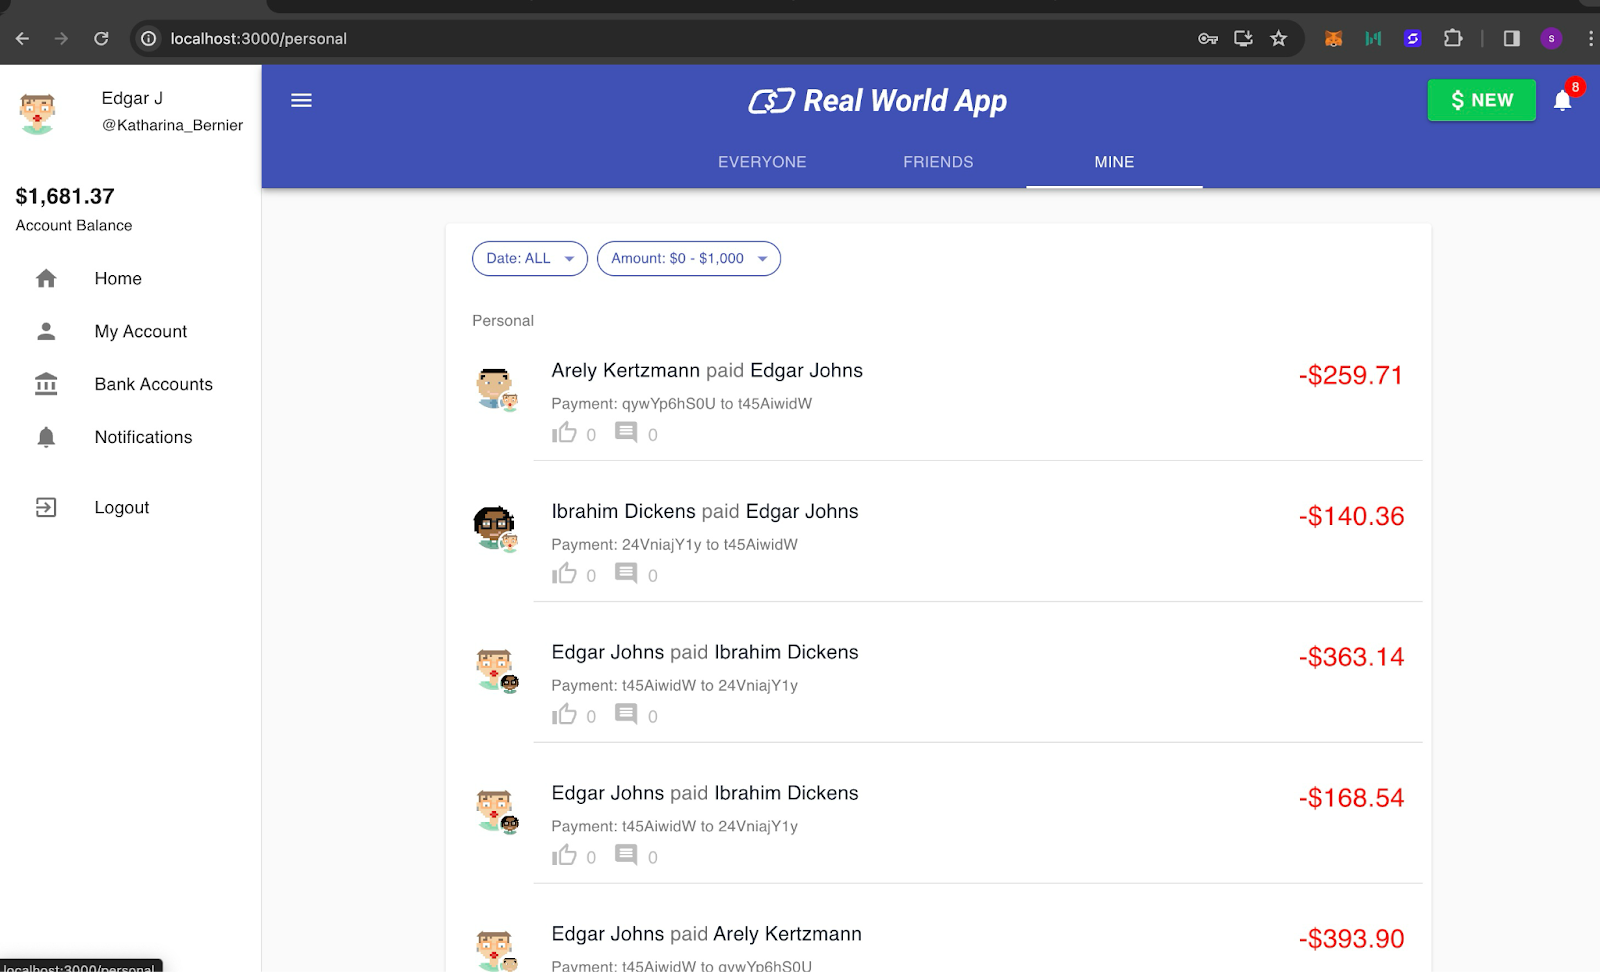 Fig 3: Cypress Real World App Personal Transactions Page
In your Cypress tests, follow the below steps,
- Step 1: Login
- Step 2: Intercept the network request that fetches the personal transactions and stub the response. To get this API, inspect the UI and open Developer Tools and monitor the API call under the Network tab.
- Step 3: On the Home page, click on the ‘Mine’ tab [ The intercepted API is now fired ]
- Step 4: Validate UI that it should not receive any transaction items because of the stubbed response with empty results.
Inspect the UI as below to understand the API call fired, when the user clicks on the ‘Mine’ tab. While inspecting, I would always pay attention to the URL Endpoint, Http Method, Payload if any, Response Body and Response Status.
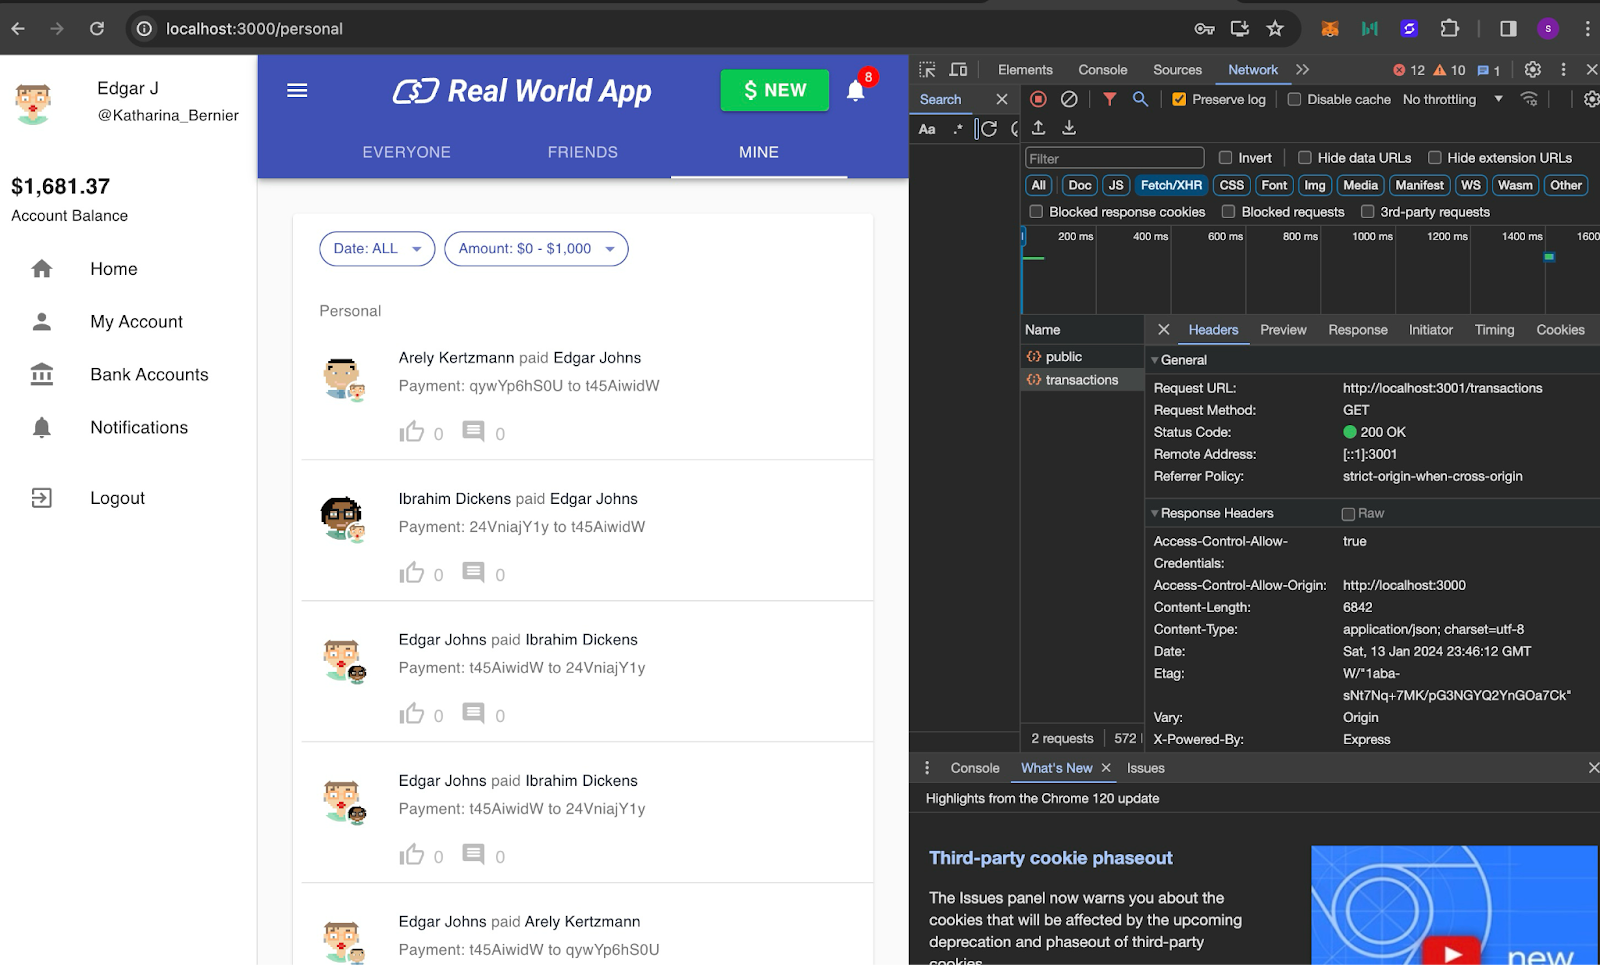 Fig 4: Personal Transactions API Request Details
The Network tab in Dev tools has a Response tab and you can see the body has a property ‘results’ which has all the transaction items. Our aim is to stub the response with empty results.
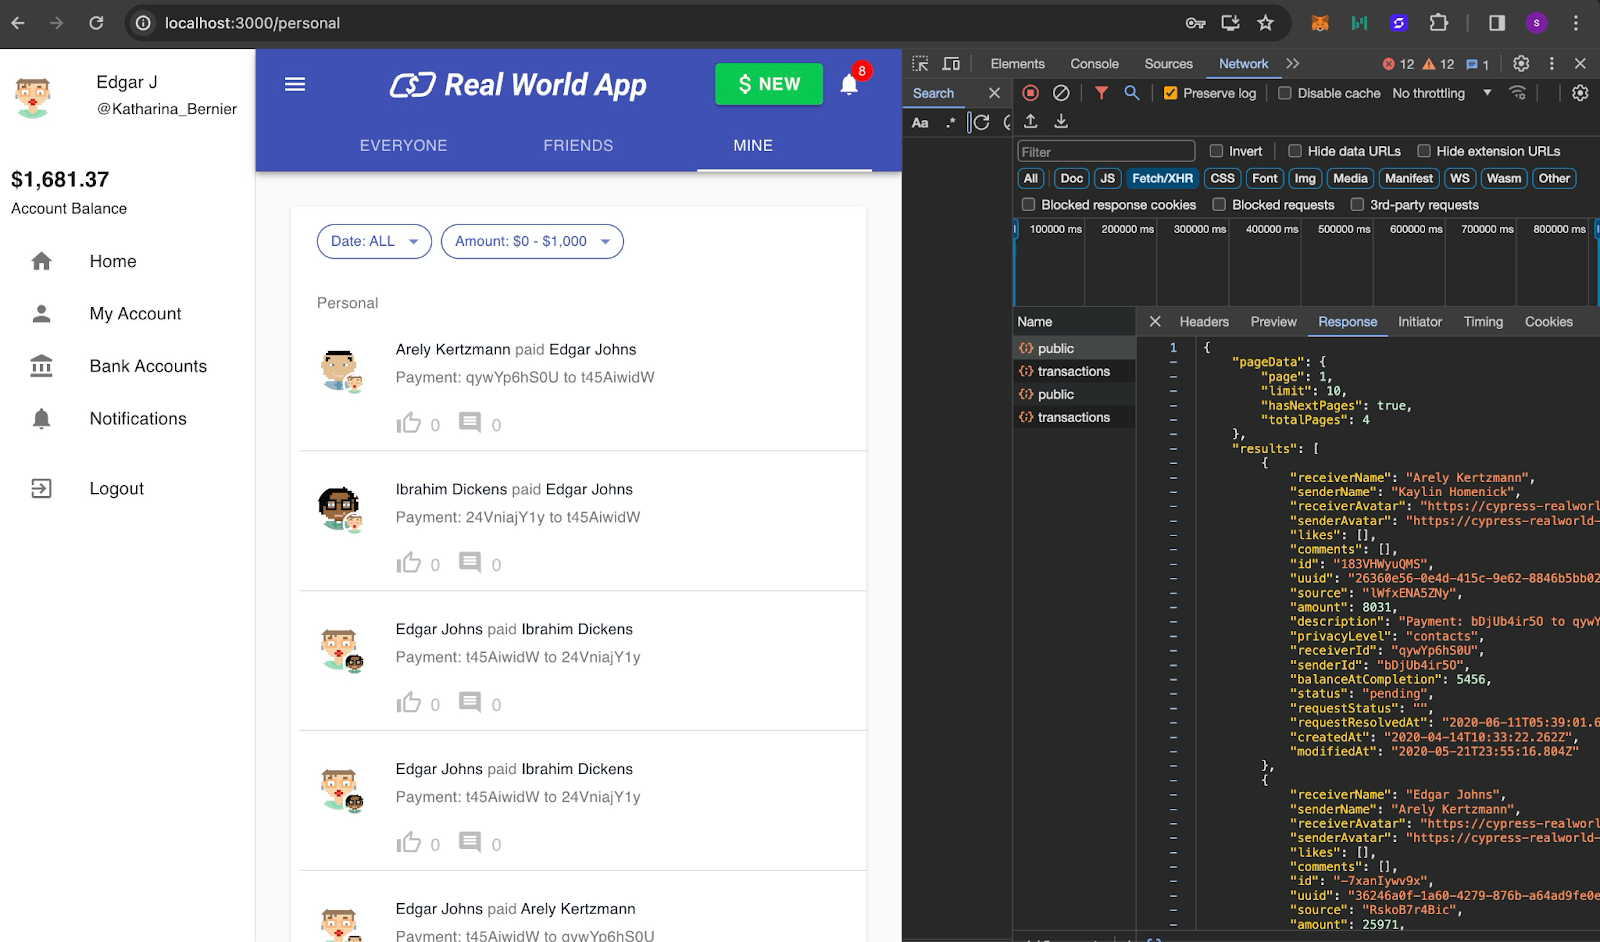 Fig 5: Personal Transactions API Response Details
If you notice the below test, the intercept method has to be placed before the specific user action [clicking on Mine Tab] is going to take place. This will allow Cypress to spy and listen to the API call to be fired. Once the ‘Mine' tab is clicked, Cypress will stub the results from the response body that is seen in the above pic to an empty object. I am stubbing the response with an empty JSON body and the syntax for this can be seen here on Cypress official docs. Once the below test is run, you can see the UI with a stubbed response. To validate this, I am asserting that the UI element locator for transaction items should not exist
describe("validate UI for no results in user transactions", () => {it("should display a user friendly message for no results", () => { cy.loginApp(); cy.intercept("/transactions", { body: { pageData: { page: 1, limit: 10, hasNextPages: true, totalPages: 24, }, results: {}, }, }).as("personalTransactions"); cy.get('[data-test="nav-personal-tab"]').click(); cy.get('[data-test="transaction-item]').should("not.exist");});});
In the Cypress runner below, Cypress shows the intercepted API call using its alias, ‘personalTransactions’. Because of the stubbed response, there are no personal transactions on the UI. I have now asserted that the locators for transaction items should not exist.
 Fig 6: Personal Transactions API Interception Test
Waiting on a Request and Asserting its Response Properties (status code)
The Notifications Icon on Home Page displays all the user notifications. In this scenario, let’s spy and assert the response status code is 200.
In your Cypress tests, follow the below steps:
- Step 1: Login
- Step 2: Intercept the network request that fetches the notifications. To get this API, inspect the UI and open Developer Tools and monitor the api call under the Network tab.
- Step 3: On Home page, click on the ‘Notifications’ icon [ The intercepted API is now fired ]
- Step 4: Validating UI based on the expected or the stubbed response.
Let’s inspect the UI to have a peek at the API details. The URL endpoint is ‘/notifications’, the Http Method is ‘GET’ and the response status for this call should come back as 200.
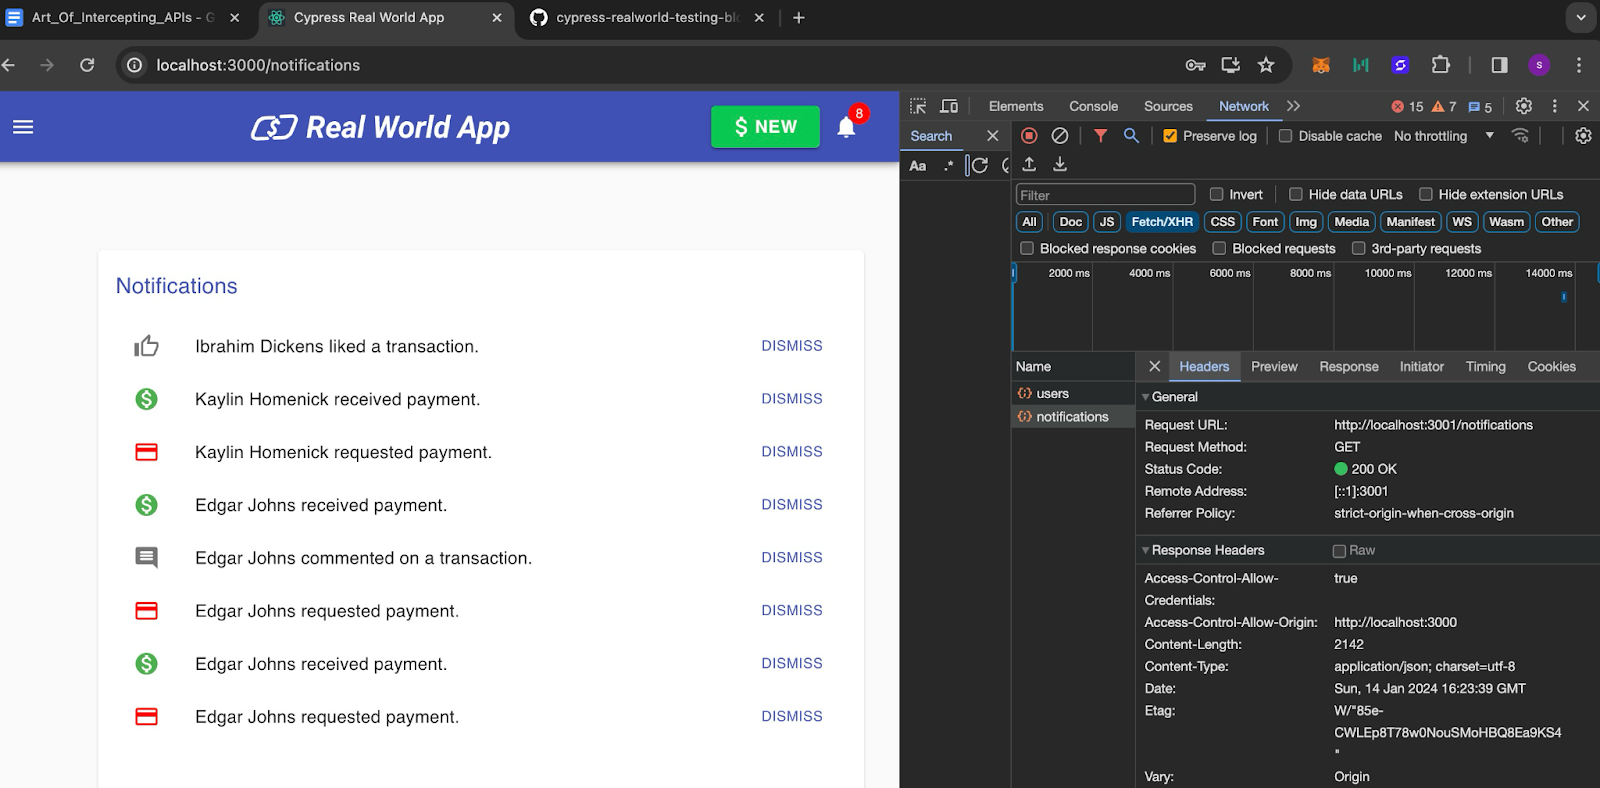 Fig 7: Notifications Page API Request Details
I have intercepted the above URL and waited for it using the alias. I have chained the response status assertion on the yielded object. The syntax for this can be seen here.
describe("validate UI for user notifications", () => {beforeEach("login the application", () => { cy.loginApp();});it("should return a status code of 200", () => { cy.intercept("http://localhost:3001/notifications").as("notifications"); cy.get('[data-test="nav-top-notifications-link"]').click(); cy.wait("@notifications").its("response.statusCode").should("eq", 200);});});
The cypress runner below will show the wait for the intercepted alias and the chained assertion for the response status code to equal 200.
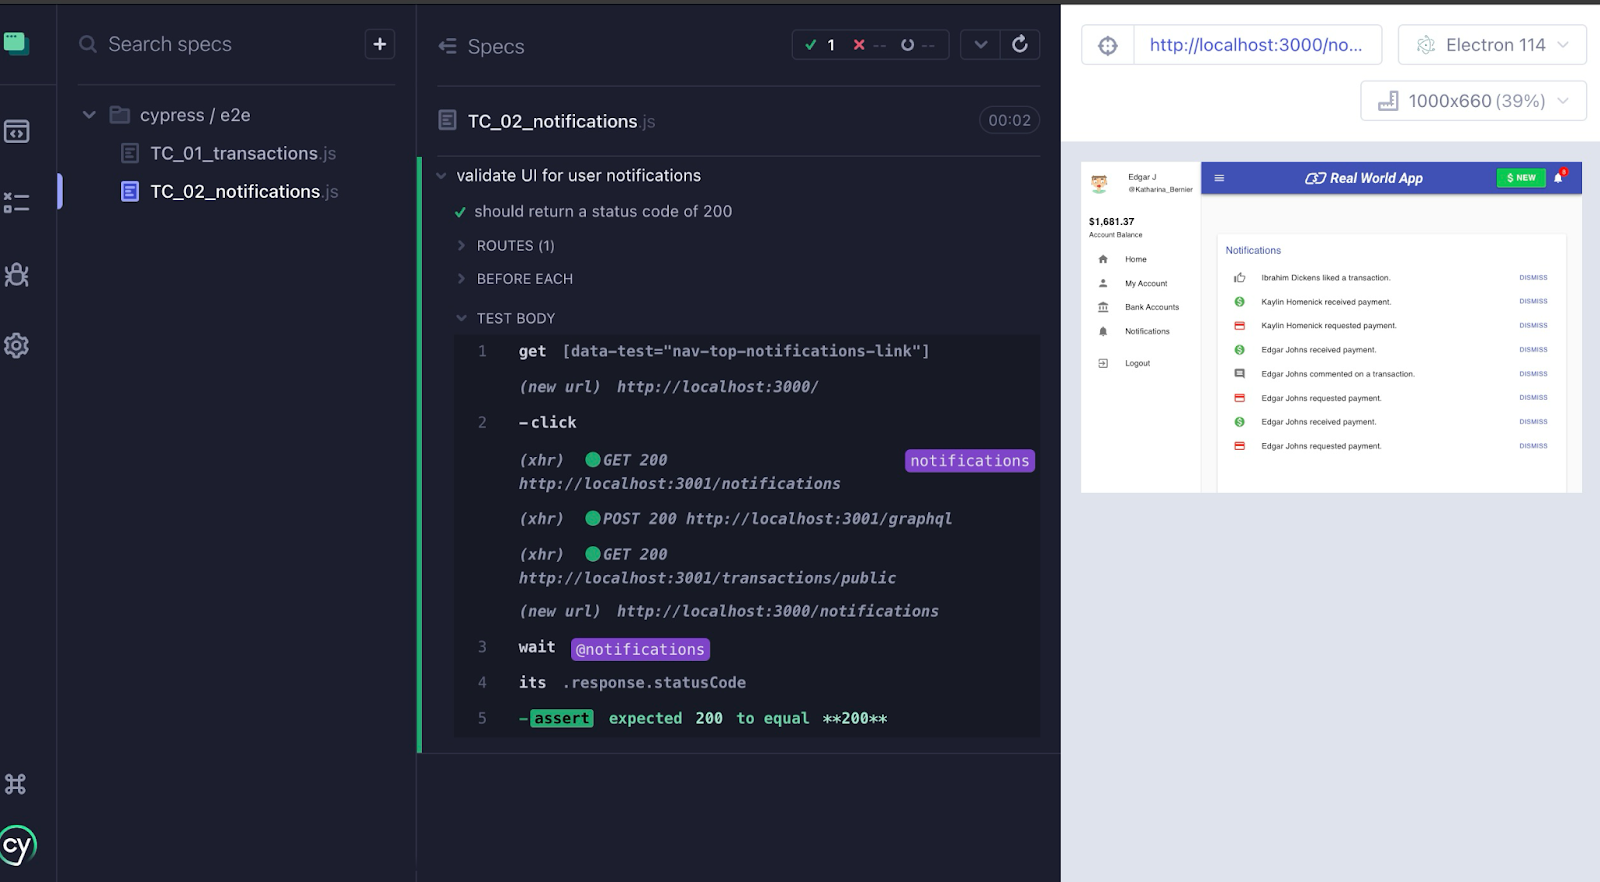 Fig 8: Notifications API Intercept Test
Stubbing the Response Status Code
In this test scenario, we will be using the same Notifications tab as the above example. Instead of asserting the response code, we will be stubbing the response status code to 401 (unauthorized) and validate the UI for this response.
In your Cypress tests, follow the below steps,
- Step 1: Login
- Step 2: Intercept the network request that fetches the notifications and stub its response status code. To get this API, inspect the UI and open Developer Tools and monitor the api call under the Network tab.
- Step 3: On the Home page, click on ‘Notifications’ icon [ The intercepted API is now fired ]
- Step 4: Validate UI based on the stubbed response status code.
For stubbing the response code the Cypress syntax can be found here. Now let's stub the response status code to 401 and assert the UI locator for the empty list of notifications is asserted to be present on the DOM.
describe("validate UI for user notifications", () => {beforeEach("login the application", () => { cy.loginApp();});it("should return a status code of 200", () => { cy.intercept("http://localhost:3001/notifications").as("notifications"); cy.get('[data-test="nav-top-notifications-link"]').click(); cy.wait("@notifications").its("response.statusCode").should("eq", 200);});it("stub response code to 401", () => { cy.intercept("GET", "/notifications", { statusCode: 401, }).as("notifications"); cy.get('[data-test="nav-top-notifications-link"]').click(); cy.wait("@notifications").its("response.statusCode").should("eq", 401); cy.get('[data-test="empty-list-header"]').should("exist");});});
The Cypress runner below shows the response code is stubbed, and the notifications list is empty. The assertion for the presence of a UI locator for the empty list on the DOM has passed.
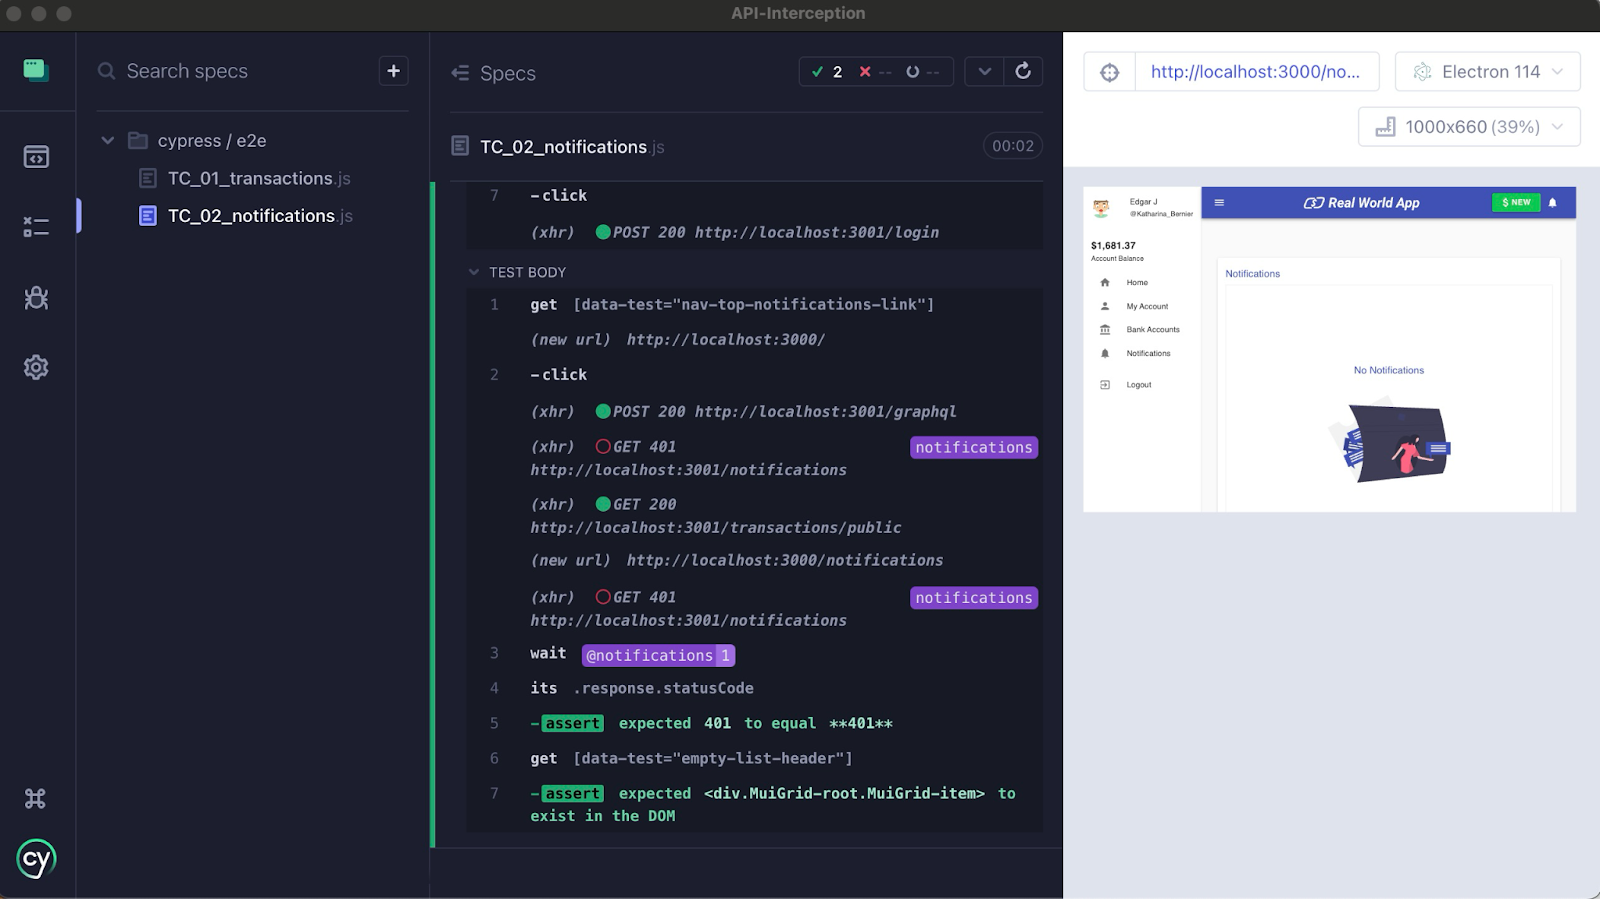 Fig 9: Notifications on UI made empty by stubbing API Response
 Stubbing the Request Payload
This test scenario is my personal favorite and let's see what it is about!
- Once Cypress loads the Login Page, the login username will be ‘Katharine.Bernier’.
- We can spy on the login API and modify the username from the outgoing request body to ‘Jessyca.Kuhic’ before it hits the server.
- When the Sign-In Button is clicked after entering the user credentials, the intercepted Login API will modify this request payload that contains the username 'Katharine.Bernier' to ‘Jessyca.Kuhic’ before the request hits the server.
As mentioned earlier, you can get the list of test users by the below command and you can see all the information in the Getting Started section.
| yarn list:dev:users |
On the UI, the username is entered as Katharina_Bernier.
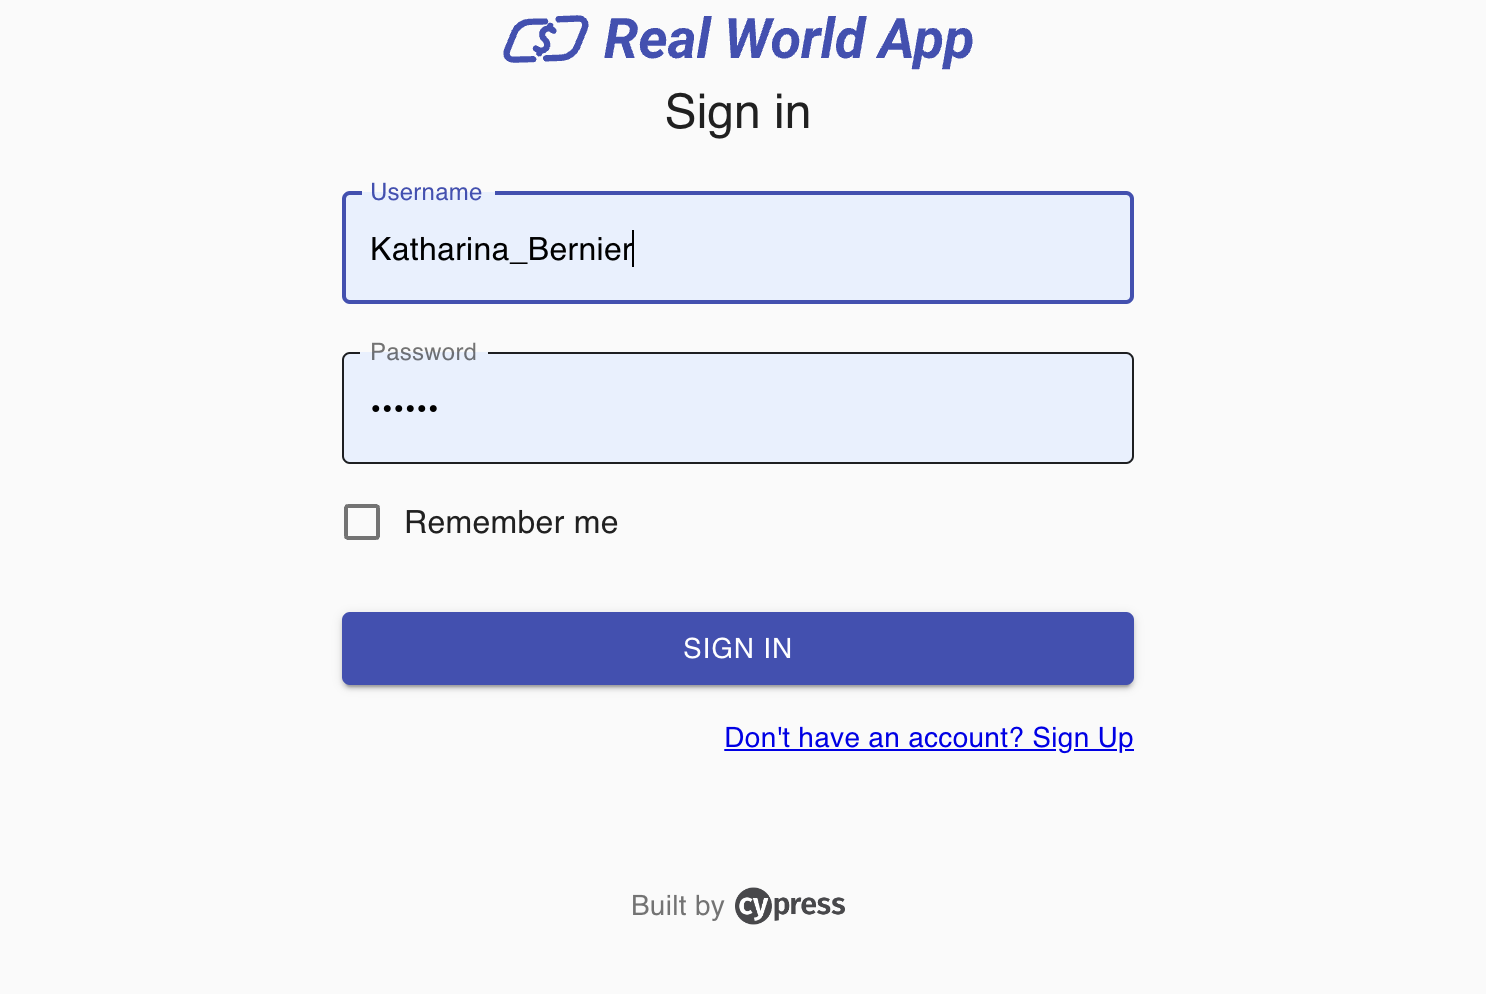 Fig 10: Cypress Real World App Sign In as Kathrina_Bernier
After clicking SIGN IN, the network tab shows the request payload has the username as Katharina_Bernier. I am going to modify this request body so that the username will be changed to Jessyca.Kuhic who is a valid test user given by Cypress.
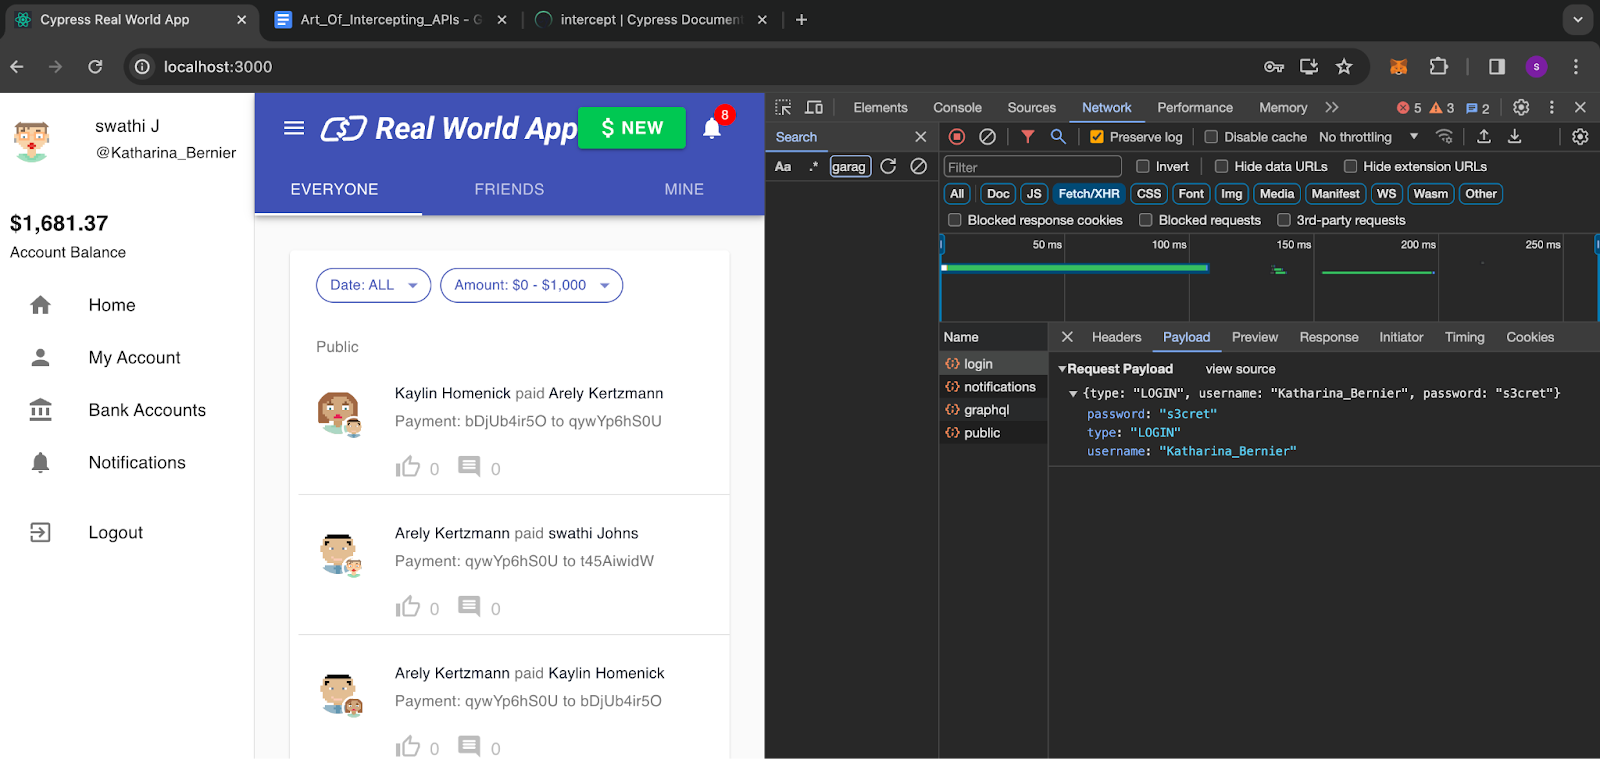 Fig 11: Sign In API with Payload showing Kathrina_Bernier
The syntax for spying and modifying the request using the routehandler function can be seen here. We are going to spy for the API call with the endpoint ‘/login’. When the request is fired, we will be manipulating the request by modifying its username to Jessyca.Kuhic, so that after the request is made, we can assert that the username has been updated.
describe("validate user login", () => {it("should modify the username in request payload", () => { cy.visit("http://localhost:3000/"); cy.intercept("POST", "/login", (req) => { req.body.username = "Jessyca.Kuhic"; }).as("interceptedLogin"); cy.get('[data-test="signin-username"]').type("Katharina_Bernier"); cy.get('[data-test="signin-password"]').type("s3cret"); cy.get('[data-test="signin-submit"]').click(); cy.wait("@interceptedLogin") .its("request.body.username") .should("eq", "Jessyca.Kuhic");});});
The Cypress runner below shows, the user is signed in as Katharina_Bernier. Whereas the intercepted API shows the username in the request as Jessyca.Kuhic and the assertion has passed. Which means, that after signing in as Katharina_Bernier, we have successfully stubbed the request payload before it hits the server.
Note: In your project, you can even try using the same scenario by stubbing the payload with an invalid user and assert for an unauthorized response body and status.
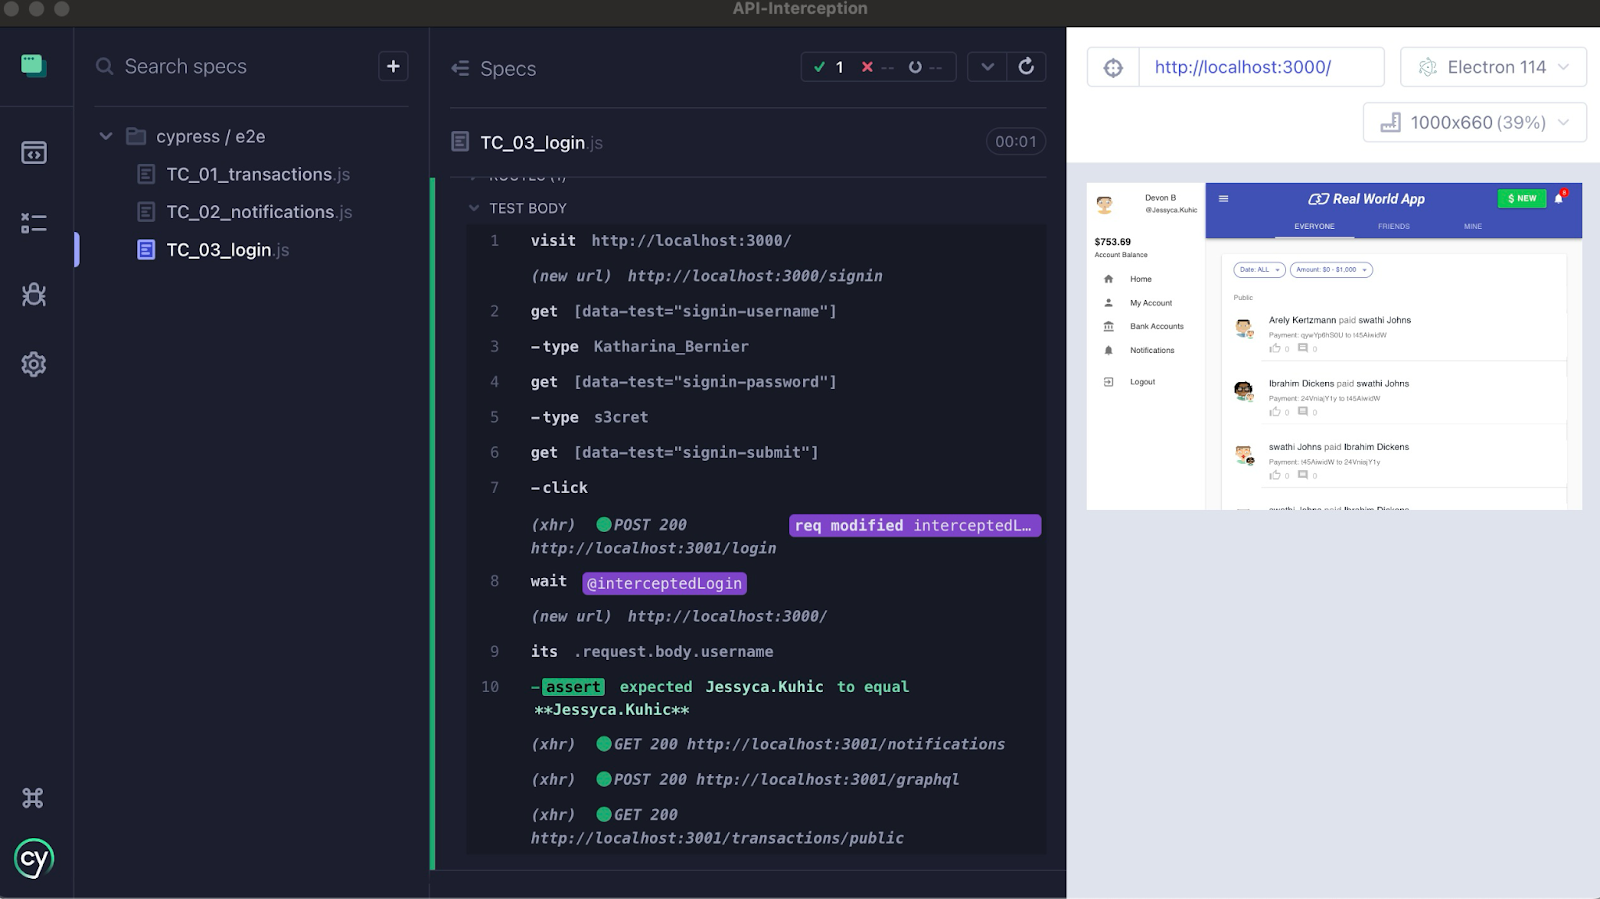 Fig 12: Sign In API with Payload stubbed as Jessyca.Kuhic
We have seen some good real time examples of request and response stubbing using Cypress intercepts. There are a lot more possible ways we can try intercepting APIs and you can try them out using the official Cypress document. Cypress has done a very good job in maintaining a vibrant community to address any technical issues / doubts and the repo is up to date and fully functional.
I have hosted my repository containing the above explained cypress tests on Github. This will help you to run the tests straight away once you have launched the demo application. Please always remember to launch the application before running the Cypress tests.
I hope this article has given you a stepping stone to introduce seaming in your test automation.
To Wrap Up
I hope this article explained the concepts of API interception and how this helps you to elevate your tests. I use API intercepts in my tests to validate the outcome of a UI interaction, capture a response property in an environment variable to use as in-line parameters for API requests and cover edge case test scenarios by stubbing the response properties. Another important benefit of intercepts is it helps to manage the brittle nature of the application’s UI. For example, I preferred waiting for intercept aliases instead of hard waits for a specific time as explained in this article.
Let me know in the comments about your favorite API Interception strategies. If you’re new to this, do you think you will be adopting this in your automation tests?
For More Information
- Gaining Confidence With Cypress Tests, Rob Richardson
- Hello Cypress!, Kate Nesmyelova
- Cypress Official Website
- Introduction to Cypress, Marie Drake
- Intercepting API’s using Playwright
- Alternative API Testing Tool, Postman
- A Beginner's Path to API Testing, Ministry of Testing Collection
- Community Guide on UI Automation, Ministry of Testing Collection